Thursday, May 23, 2013

Quilting in Miniature with Humunguous Results


Though not really small enough to be classified as a miniature at 52"x42", this quilt pleases big time.  


You have to appreciate the intricate piecing in all twelve of the quilts' 6" blocks.


A neutral thread was chosen, and fern wreaths were quilted in each block, triangle and half-triangle.  My customer didn't want florals, and really, the quilt didn't beg for them, either.


There were two skinny borders attached to the quilt center, one requiring some small-scale piecing of triangles and squares.  Both of these borders were quilted by SID (stitching-in-the-ditch), with the strip-pieced border being embellished with the same curls found in the fern wreath pattern.


The outside border fabric contained a very busy paisley pattern.  When considering what to quilt in these types of areas, I never choose a busy quilting design because the effort just gets lost visually.  So, a larger rendition of the fern theme was quilted along a curve, seen better in photos of the backing, below.


The shots directly above and below were also taken outside while I was patiently waiting for clouds to reappear after taking the full backing shot (above).   But, a watched pot never boils, so I took these pictures that show the shadows of a nearby ponderosa pine tree.  Kind of a cool effect!


Even though summer is in the wings and the garden or children/grandchildren beckon your attention and time, if you have a miniature project that could conceivably be finished by autumn, go for it!  The rewards will be ... well ... humunguous!

Thursday, May 16, 2013

Go Be Dazzled II


Some of you may remember my post from a few weeks ago about a quilt top brought into my studio pieced with the pattern Go Be Dazzled.  Today's post features its miniature.  Of course, this little gem begged a custom treatment since there was so much blank canvas around each appliqué grouping...


...and that is exactly what it received!  A double curve was quilted in the four corners, feathering on the outside of each curve.  The background of the inside of the curves was filled with 'pebbles', duplicating the pebble-like quality found within each appliqué.


Without changing the 'ice blue' thread color used in the center of the quilt, the border was quilted in feathers to 'balance' the feathering quilted in the center.  Just enough to show off without being too vain!

Here's a close-up of the appliqué and quilting in the center.  The hearts seem to  kiss :-).


Here are a couple close-ups of the backing.  Sometimes quilts have been bound with the intent of using them as reversible quilts.  This one could certainly be used that way.


It's a fun challenge to be able to 'doodle' in the open space of a quilt such as this, however I don't believe in overwhelming any quilt with elaborate stitching. My rule is just enough to 'dazzle'!


Thursday, May 9, 2013


The Perfect Wedding Quilt:

Queen and Her Court 


Well, it was perfect for our daughter and son-in-law!  A couple of years ago, Heather spent days combing through dozens of quilting magazines to select a pattern for me to make her and her betrothed the perfect wedding quilt.  
There wasn't an abundance of time given, but really, is there ever for a wedding quilt?! To choose the right pattern and fabric takes an incredible amount of time and effort, not to mention piecing, appliquéing and quilting. 


We only had 12 weeks to get this quilt completed in time for the open house.


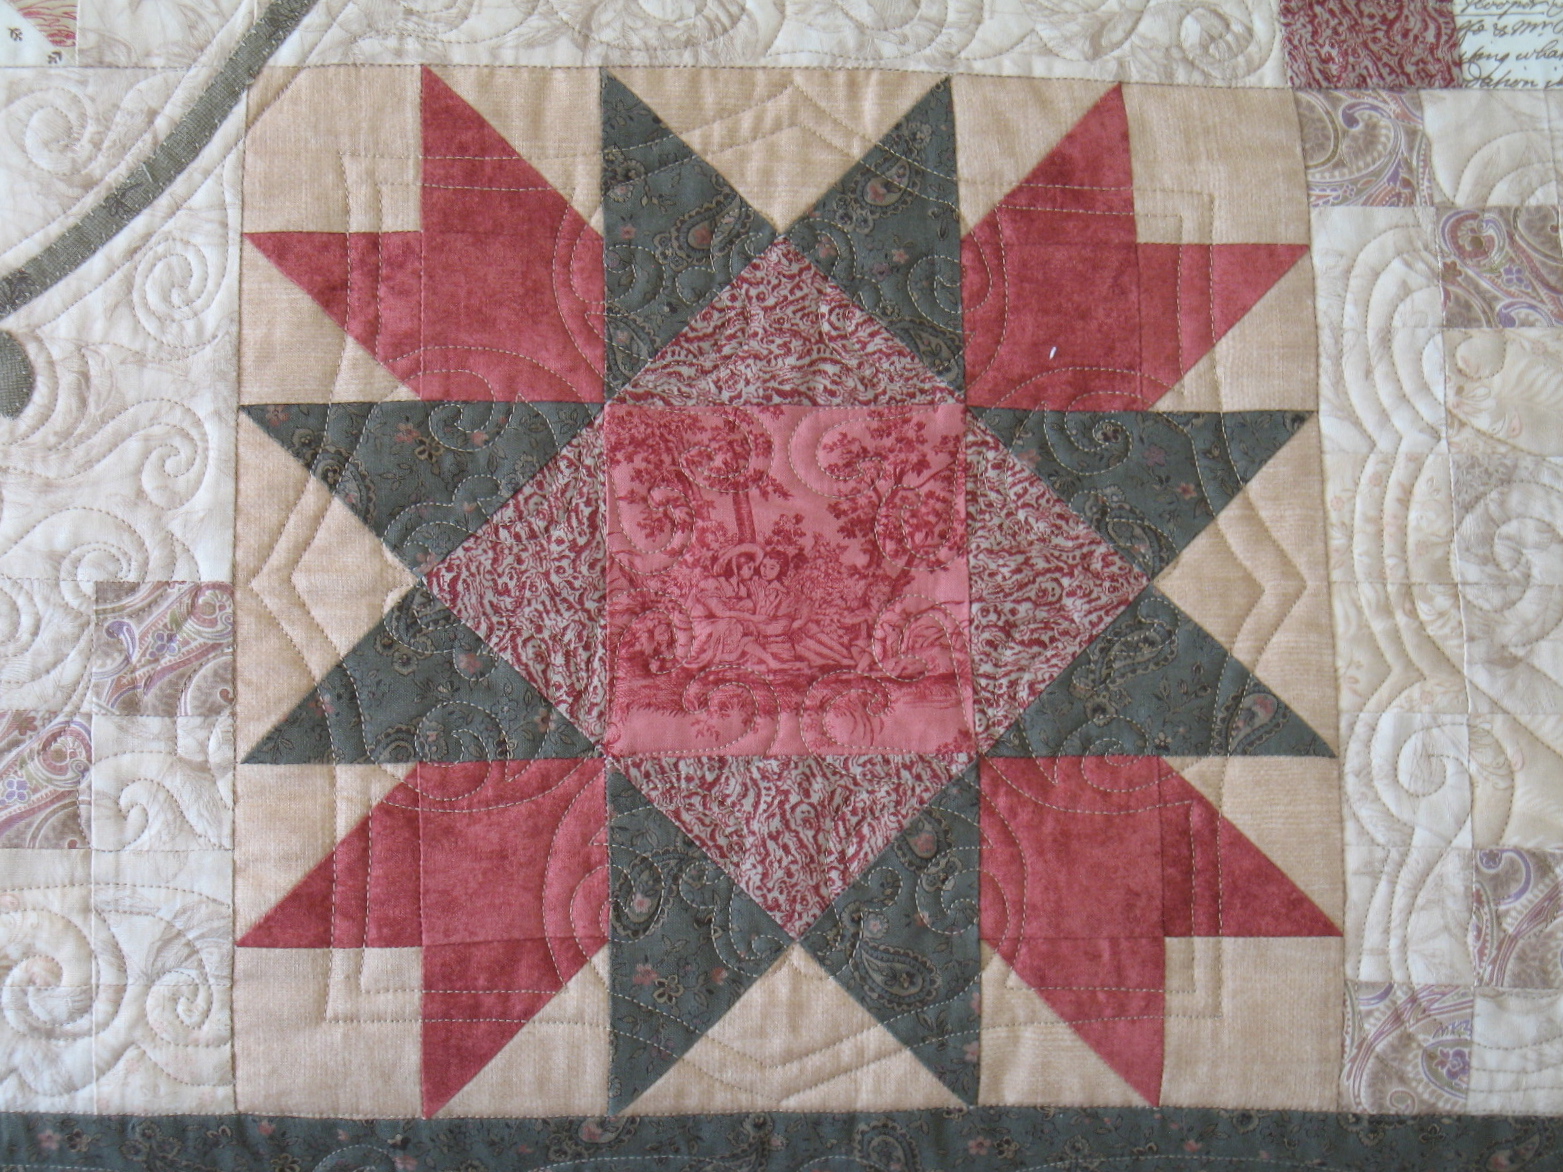
Queen and Her Court boasts 12 different blocks which seem to weave themselves via appliquéd  flowers and vines around a large, central block known as the 'court'.  Impeccably, Heather chose fabrics that worked well together; toiles, dusty reds, paisleys and fabric with writing - colors that blended together to spell romance.  We agreed ahead of time that I would be the one to arrange those fabrics from her palette for the blocks and appliqué.  I wanted the finished quilt to 'present itself' to the queen, as it were, without her anticipating the result.

The blocks featured here are some of my favorites.  The ones immediately above and below show a fussy-cut vignette of red toile in the center.


It needs to be said that the designs used in the blocks and center of this quilt were taken from Karen McTavish's Custom Curves, found on Karen's website at designerquilts.com/products.html, from her publisher at onwordboundbooks.com/books.html or amazon.com.  Heather and Conor's quilt seemed, to me, to exude a Celtic feel, and Karen's designs in this book were a perfect match.


I adapted Karen's designs for my blocks by enlarging them with my computer scanner, and quilted them by using my laser light at the front of the machine directly onto each block without marking.


Below is a shot of the backing which shows the quilting details of one of the blocks:


Some of the blocks served as 'building blocks'  for the twelve pieced blocks, such as this one, at left.  I quilted each of these identically for balance as well as beauty with my laser light, improvising by echoing and stippling  to fill in a similar design.


Here's a couple close-ups of  flowers appliquéd over a building block which shows the stippling I designed to match Karen McTavish's block designs.


Those of you familiar with Queen and Her Court will notice the center of the quilt has been reengineered (below)!  This is Conor's specific section of the quilt.  He wanted a fleur de lis in the center instead of the large, pieced block that was originally part of this pattern.  I found a great design, improvising it further by appliquéing a double-ring around the bouquet instead of a single one, making it a true wedding quilt!

I meandered relatively tight to 'pop' the corner designs around the fleur de lis:


This photo of the backing (kind of) shows the quilting of the fleur de lis block:


The borders were all hand traced with chalk atop a light box, an exhausting task but well worth the effort when completed.  To date, Karen McTavish hasn't made stencils of her designs found in Custom Curves.  For this project, I surely wish she had!  
In the following shots you can see the details of the border quilting as seen from the back:


Heather and Conor's quilt is definitely one of a kind...just the way we want all of our quilts! 

Monday, April 29, 2013


Every now and then a quilt top travels a very long way to my studio.  


This one came from Kansas through many decades, fashioned by a loving mother of eleven children.  She bought many blue floral feed sacks - originally full of flour or sugar - and when empty and washed, and her appliquéd tulip blocks were completed, she could piece them into this precious quilt top.

For reasons unknown (why do we store quilt tops?!), her creation waited for a certain granddaughter to treasure many, many years later.  This granddaughter wasn't a quilter, but desired to have an heirloom; a tangible reminder of the visits to a grandmother long past.


I get a few goosebumps whenever I load a quilt with history, such as this one!  As I've said in earlier posts, when I work with vintage quilt tops I machine quilt them in the style of the era in which they were made, as closely to what a hand-quilter would have done had she finished the quilt.

So, for this quilt, I echoed around the appliqué in the tulip blocks and quilted a feather wreath in the feed sack blocks.  I selected to echo around each wreath, not only to maintain a balance in quilting style, but density as well.


My customer added three borders to the center of the quilt top so it would cover her (much larger) bed so she could use it and display it.  

Here, you can see her borders when the quilt was loaded on the machine.  Her brilliant choice of reproduction '30s fabrics was a perfect bridge between past and present, enabling me to continue the feather theme I quilted in the feed sack blocks.  Piano keys with radiating lines in the corners were quilted in the outer border.


The neatest part about this quilt is that it is loved as a finished piece, not just hanging, waiting, and unappreciated.  Granted, it would have been much more special had it been hand-quilted in Kansas decades ago.  I gratefully own quilts from both my paternal and maternal grandmothers who painstakingly hand-pieced and hand-quilted them.  One was a busy farm wife, the other the wife of a rural postal carrier - but more about their lives and quilts in an upcoming post.  For now, my feelings are that you simply cannot have these cherished heirlooms without appreciating the woman that fashioned them, and the life they lived.  

And so I am thrilled when a quilt such as this, with rich history just oozing from the fibers, stops at my door to visit for a while...

                                                   ...it is another reason why I quilt.


Friday, April 19, 2013

Return with Honor


When our son-in-law left for a tour in Afghanistan a year ago, I asked him if he would like a quilt to celebrate his return.  He grinned at me, knowing it wouldn't be the first he'd received, but possibly one that had the most feeling behind it.  

He was right. 


Part of that feeling was my desire to make it using materials he would like.  Being in the army and being male, I chose flannels for the top that would suit his gender and in colors that would closely match an infantryman in the desert - except for the green, I suppose.  

How much green can you find in a desert? Truth be told, the green flannel was chosen to match the backing:  a vintage WWII Army Issue wool blanket. Right:  the top is ready for the quilting process, placed on top of the army blanket with very little leeway.  


Here the U.S. insignia on the army blanket can be seen on the quilt backing.  I made sure it was placed in the center!

The pattern I chose for this very manly quilt was "Kasuri Gesiki", a Japanese log cabin design (do they have log cabins in Japan?!), which made its debut with Robert Kaufman fabrics, looking very (what else?) Japanese.  My choice of fabrics didn't translate to that culture, I hope!!  Using the pattern, the block size came out to 5" x 5", but with the bulkiness of flannel, I adapted all measurements to produce 10" x 10" blocks.  
To quilt it, I stitched-in-the-ditch and stitched one circle in each block.  
My Gammill did great working with a heavy Army blanket as backing - a first!  I did use wool batting - not needed since it's certainly heavy enough - but I wanted extra warmth.

When Conor returned December, 2012 I was thrilled to gift him this special quilt - all wrapped up in feelings of joy, pride, relief and excitement - packed with emotions like  no other quilt I've given to anyone before!  And the best part?  Well, I hope he remembers that love when he wraps up in it, each and every time.

And that's why I quilt.


Friday, April 12, 2013

Go Be Dazzled!


I can't think of a better moniker for this quilt than this dazzling one I quilted up for a customer recently.  The photography just doesn't catch it.  (Sorry, I'm a quilter, not a photographer - I'll improve)!  The picture, above, was taken outdoors at 8:00 a.m., creating a washed-out effect.  But the two pics below were taken indoors with good light, allowing the warmth of the true colors to come through.


And what colors!!!!  They definitely are dazzling.  It's incredible how much black fabric there is nowadays, probably because of how it can contrast with any other color.


The appliqué work, embroidered using her Bernina, begged feathers because some of the appliqué are feathers (notice the black border on all shots, plus the close up, below).


 A fun part for me is taking the finished quilt off the machine to look at the back. I love how the solid color of this backing allows a black-and-white-negative effect.


I hope your true colors come through on your next quilt!  It doesn't have to be a Go Be Dazzled! pattern.  But aim to choose colors that maybe aren't the ones pictured in the pattern - ones that you like.  And it doesn't have to be custom-quilted, like this one was.  Make sure you look at my 'Pantographs' tab on my blog to find just the right one to dazzle at ppatchworks.blogspot.com/pantographs...at least I hope this link gets you there.  If not, certainly enter my blog address, then click on the tab...
...which reminds me, customers have taken advantage of my Second Quarter Special already. It's a doozie!!!  Don't miss out.