Tuesday, October 15, 2013

Vintage Series IV - Dresden Plate and Snowball


Welcome back to the carriage house!  Today we're going to go inside to see how my friend has renovated a tiny room into her art studio.   While there we'll take a peek at two quilts from my vintage collection: a Dresden Plate and Snowball.


The popular name for the first quilt, Dresden Plate, reflects the romance of the Victorian Era with its love of elaborate decoration on household items and décor. 


Dresden, Germany was a center of 19th century romanticism movement in art, one that included the fine decoration of porcelain. The plates were embellished with elaborate design using flowers, fruits and foliage. The beautiful plates would surely have been admired by women of the early 20th century.


The Dresden Plate quilt pattern was one of the most popular quilts made during the 1920s and 30s. It was first published in the 20s but not always under the name Dresden Plate. Grandmother's Sunburst, Friendship Ring, Aster, Dahlia and Sunflower are all names associated with this pattern.


This quilt is made of blocks with fabric appliquéd in a series of radiating "petals" with flat sides, radiating from a central circle which is more representative of a flower than a plate.
A few Dresden Plate quilt blocks are made with a smooth outer circle. More often the ends of the "petals" are rounded or pointed. Occasionally the pointed and curved forms are combined. 


Next; the Snowball pattern, which is one of the best-known of all Amish quilt blocks.  The one featured here is an early 20th century charmer.


The Snowball pattern is one that fools the eye by creating an optical illusion. From a distance, a snowball block looks like a round circle, but it is actually an octagon, an eight-sided figure.  


Close up, you can easily see that the snowballs are easily formed by taking a square of cloth and sewing a triangle across each of the 4 corners.  


Here I've zoomed in on the backing, which shows the feathering detail I've quilted in and around each snowball.  This quilt was fuuuuun to quilt!


For those of you who are anxious to see what this studio looks like without the quilts, I've included a shot.  It's how my friend spends some of her summer days. 

It aptly illustrates that whether we create using a medium of paint, food, words, clay or fabric, all women need to connect the beauty within to the beauty without.  

So, go create!


Monday, October 7, 2013

Vintage Series III - Grandmother's Flower Garden


THE MOST POPULAR QUILT PATTERN
Welcome back to the Vintage Quilt Series!  Today we're going to explore one of my favorite vintage quilt patterns, Grandmother's Flower Garden.  
I'm not the only one enamored with its beauty. Barbara Brackman reports that the Grandmother's Flower Garden was the most popular pattern after 1925. She tells us, "...many women who never made another quilt finished a Grandmother's Flower Garden."
“Modern" quilters loved the endless color combinations and ways the blocks could be set together with this pattern. 
She relates, "Another matter of pride is the number of small hexagons in the finished quilt, often many thousands." 
Although many Grandmother's Flower Garden quilts do not contain many thousands of hexagons they still represent a great deal of labor.  
The most common way Grandmother's Flower Garden quilts were made was with a central hexagon and rows of hexagons surrounding it with an interconnecting row of white or in some cases green for grass.

The size of the hexagon used can be varied as well. Earlier quilts tended to use hexagons an inch or less across while 20th century hexagons tended to be larger.

The vintage quilt top featured here had thousands of 1" hexagons pieced by hand. Desiring to use it, I needed to quilt it up king-sized, so I added yellow borders. The hexagons were quilted in continuous curves, the flowers in a floral pattern, and the borders in luscious feathers.  Quilting by machine was an arduous task - I can't imagine quilting it by hand.
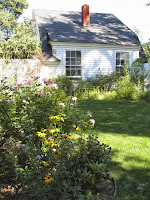
FYI:  The backdrop for this post was my friend's late 19th century home, the same that was featured in the Vintage Series I & II.  Pictured at right (and above) is the carriage house situated at the end of her back yard.  More than 100 years ago it served as the shelter for the master's carriage and horses, as well as two small rooms for the groomsman's family.  On a post is a hand-written record certifying the birth of a baby in 1896 and a solemn statement, witnessed by another man, to the father's promise to quit smoking in the same year!  No doubt the mother didn't like smoke around the newborn baby!


Wednesday, October 2, 2013

Layered Toffee Cake


The Layered Toffee Cake at the Grand Re-Opening was a hit!
Here's the recipe, as requested:


TOTAL TIME: Prep/Total Time: 20 min. YIELD: 12-14
Ingredients
2 cups heavy whipping cream
1/2 cup caramel or butterscotch ice cream topping
1/2 teaspoon vanilla extract
1 prepared angel food cake (8 to 10 ounces)
9 Heath candy bar (1.4 ounces each), chopped

In a bowl, beat cream just until it begins to thicken. Gradually add the ice cream topping and vanilla, beating until soft peaks form. Cut cake horizontally into three layers. Place the bottom layer on a serving plate; spread with 1 cup cream mixture and sprinkle with 1/2 cup candy bar. Repeat. Place top layer on cake; frost top and sides with remaining cream mixture and sprinkle with the remaining candy bar. Store in the refrigerator. Yield: 12-14 servings.