Saturday, September 9, 2017

Americana!


When traveling through the country, I'm always on the search for old barns.  They capture the essence of family life from decades gone by.

I searched for just the right barn for my post today as backdrop for two quilts; a star-spangled Americana and a sweet Farmgirl Vintage quilt.


Who can resist the country colors in this great Americana quilt?
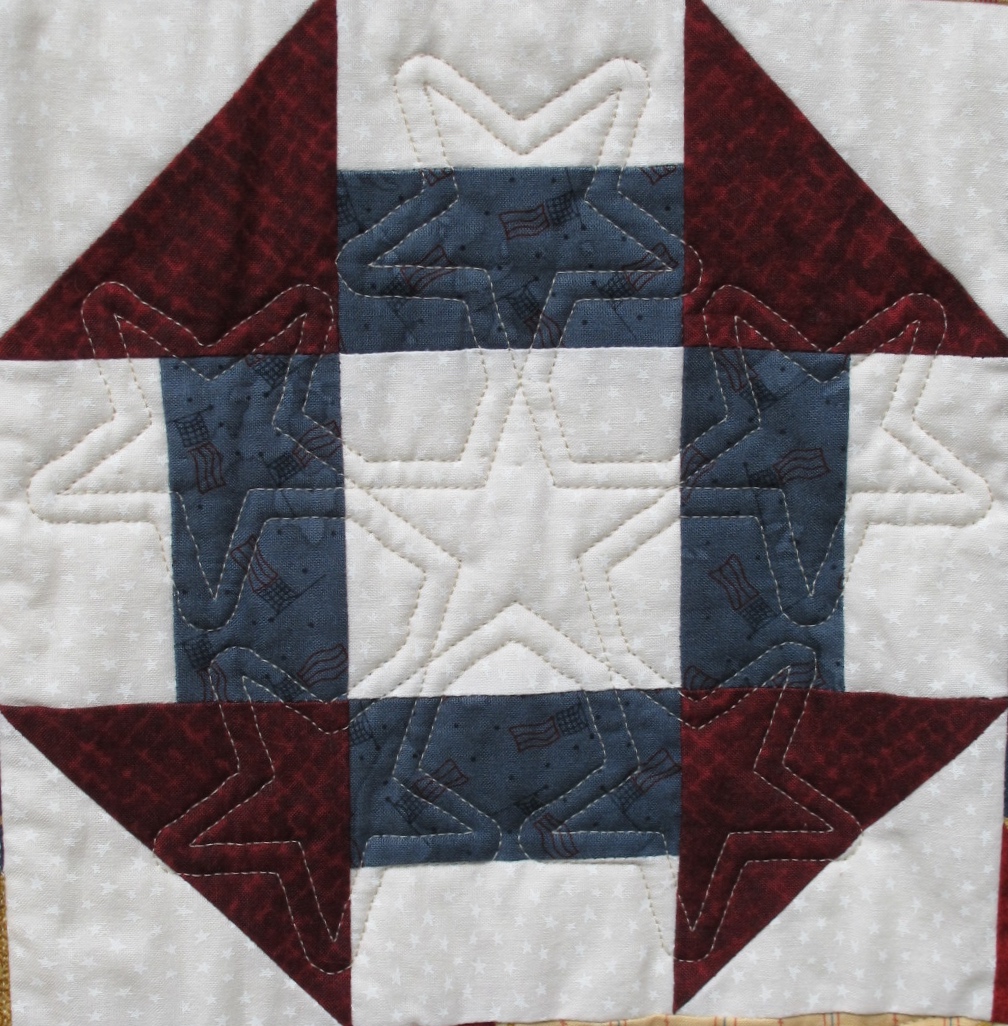
Let's get some detail on the many blocks...


 On hand to 'help' is the barnyard cat. She wanted to help several times. No kitty!


 The quilting style I chose was full-blown Americana with stars, stripes, chevrons and a bit of country thrown in, of course. I mixed digital and hand-guided techniques.


My client said this was one of the first quilts she'd attempted to make ten years ago, because it taught her all kinds of techniques. I'd say so! And I'm also glad she finally got it quilted so she can enjoy it.


The Farmgirl Vintage quilt is right at home in these pictures. It's so bright, cheery and full of blocks depicting farm life. You can't help but smile looking at it. The same client pieced/appliquéd both of these charmers, and I'm glad she didn't wait 10 years to have this one quilted up!


It seems I've attracted quite a crowd with all the photography fuss. Their kind is represented, actually, on this quilt...


Isn't it great?!


Let's take a look at a few more...


I just canned some wild blackberry jelly last weekend!  It's so wonderful to have it lined all up, just like in this quilt block. The sweet flavors will extend summer through many a bleak, cold winter day.


An old red barn! How did this quilt know it would be photographed next to a real one?


My thanks to the family who allowed me access to their property. They train sheepdogs with these sheep and lambs. They chuckled when I asked if I could take pictures of quilts next to their barn because they'd never been asked that question before. 

We all have a soft heart when it comes to what these old barns represent: family life, working together to make it work, enjoying the fruits of hard labor, bountiful blessings, being grateful for the simple things. Here's to keeping it that way for decades to come, even if you don't have a barn.


Wednesday, August 16, 2017

Prepping a Vintage Quilt Top for Quilting


So, you went antiquing and found a vintage quilt top that's been through hard times.  
You love it, but is it worth the purchase to finish?  
Or maybe you inherited a damaged heirloom top.  
Either way, today we're talking about some ways to repair them before quilting.

Disclaimer!!! Don't get me wrong - I'm no authority on how much to pay for vintage quilt tops, or that I have all the 'right' repair techniques. I just have some experience and a bit of know-how on fabrics and fixability that might help a few of you out with your treasures.

So, today we're looking at a very damaged 1930s Butterfly quilt top. When I purchased it, it had multiple stains and holes, and the outside border was so frayed I knew I'd have to trim it before quilting. To add insult to injury, those who previously owned it made some repairs that worsened its condition, like vigorously rubbing with - horrors! - 100% bleach (see below).
Don't ever use bleach directly to the fabric to rub out stains.
In fact, bleach shouldn't be used on delicate vintage fabrics at all.
Instead, I recommend Sew Clean. I knew I could repair at least the damaged
muslin but not the rare, irreplaceable jadeite green feedsack.
Think of this when considering replacing material in your vintage top.
The sashings and borders were entirely made of stretchy feedback material. I knew beforehand that this was not the best fabric to hold its shape and be square, so I had someone hold it up for me to check squareness.  It passed the test!


Gentle, medium-heat ironing did the trick to firm up the shape, as you can see in these before and after pictures.


In these last two before-and-after ironing photos, you can see how awful the outer edge has frayed. I trimmed conservatively and it worked out swell.
Whew!


I mentioned this quilt top had several holes. Before purchasing the top, I considered how I was going to repair them. Were the holes in difficult places, or could I conceivably repair them?  Here's one example of the ones in this top I felt confident about.


The condition of the back of the quilt top is just as important as the front. 
You can see in this next picture how sick it was...
...and the means I had to undergo to make it well again:
Why remove these frayed seam threads? Well, so you can't see them from the top. Some show as 'varicose veins', or dark threads through light fabrics. Besides, it just gives a cleaner result.


There were other minor repairs, like the embroidery work on a butterfly's feeler - or entire lack of one. I keep embroidery floss around just for mending vintage quilt tops. 

The repairs are completed and I'm ready (finally!) to load the 'old lady' up. I call my vintage quilts old ladies. My daughter thinks it's funny, but it's accurate, at best. I begin by stabilizing and then heirloom quilting throughout in a style reminescent of '30s quilting by SID around the blocks and shadow and appliqué stitching around and in the butterflies.


When this is done throughout the quilt, then I fill each block with scallops (aka clamshells) behind the butterflies to make them appear to be fluttering through the clouds. Another reason for this scalloping background (I've used it before in an earlier blog) is to take the eye away from uncentered butterfly motifs. What butterfly you know stays still long enough to be centered? That's what I say - they just flitter around randomly in nature, and that's what they do in this quilt.

Here's the right formula, quilting-style:
random butterfly placement + forgiving background filler = balanced look.
Also, note the replaced muslin piece in this block. It works.
The last quilting to be done is borders and sashings - and then my 'old lady' is unloaded and prepped for binding in a snappy shade of near-vintage jadeite green; the Aloe in contemporary Kona Cotton.

"The reveal"
Were butterflies really flitting about these gorgeous hydrangeas? Naw, they're ready for their reveal...

...in period style, of course.


Now this quilt has some show quality, and ranks up with the best of the vintage quilts out there, excepting the fact it was not hand-quilted in its own era. 
But it's useable, beautiful and stage-center where it finally belongs.

I hope I've helped you bring your vintage quilt tops out for finishing and revealing!
Call me if I can quilt one or two for you!


Monday, July 24, 2017

A Hot Deal Just in Time for the Dog Days of Summer!


There's still time to
 schedule your consult 
and receive 20% off quilting services!

Edge-to-edge designs only.
Call/email to book your in-studio consult now through August 31st. 
Only consults given during July & August qualify for the discount.
 Consults are always free of charge.

Connie Potter
Pacific Patchworks
(360) 450-8033

Thursday, June 29, 2017

A Pretty Pinwheel Quilt for a Windy Summer's Day


It's the middle of summer! A time I get to finish a few quilting projects. One of them is a fresh Vintage Pinwheel quilt top I found antiquing...


I'm not sure what the original quilter was thinking when she pieced her blocks. If you'll look closely, she got a few turned the wrong way. Don't you love those inconsistencies?! For one thing, it makes me feel better someone else has bobbles when quilting. And for another, it adds charm. I just think she turned her triangle template over to the wrong side one too many times when transferring the markings. Nowadays, we have more streamlined methods to make this process more accurate as well as efficient. Also, her borders are a bit wavy, and one block is quite a bit bigger than all the others which makes the quilt pull to one side, but such are the challenges in quilting any quilt, and things to look for if you're in the business.


I've added a Kona Cotton border to this antique top to match the original 'screaming yellow' fabric because l) I think it needed it and 2) I want to use it on a queen-sized bed. Most of the quilts from this (30s-40s) era were full-sized. It loads well, even though I had to take extra time to square up the side that was affected by the oversized block.


It's such a large quilt after sewing the borders on that I had to reposition my computer keyboard as far as I could to make room for quilting. Which reminds me to mention I disengaged the computer for the quilting on this quilt. Reason being is that occasionally I get the hankering to quilt entirely hand-guided.  Note that I've pre-marked the border spine before loading, which takes time, but after loading you're ready to rock and roll.


Here I'm demonstrating my choice in marking pens, the Dritz "Mark Be Gone" blue water-soluble maker. I also use air-solubles, but knew this project was going to take a while and did not want the markings to disappear before I could get the areas quilted. The caution is that with either marker, you're putting chemicals into the fabric, and they always need to be removed or you risk a chance of heat triggering the marks to reappear, and - horrors! - set permanently. 


Always remove chemicals after quilting by dunking the quilt in a clothes washer or putting it through a gentle cycle. I insert this caution on my quilt labels, to include "Always air dry your vintage or contemporary quilts - never use a clothes dryer". I'm asked sometimes if there is a certain 'order' to quilting; center and work out, border first, left to right? First and foremost is stabilizing the quilt by basting it entirely. Then working from the top of the quilt, quilt outside in, left to right. So, the border is first...


Some progress on the feathered border. For 'perfect' feathers, I quilt one side at a time.

I've quilted as much of the border within my throat depth as possible. Now I'm ready to quilt through the center of the quilt before I advance and continue. This picture seems rather dark but was taken with the intension of the shadows revealing the quilting, which is better than a total wash-out with the light bar on. That being said, sometimes I also quilt using real daylight so I can see the effects of the quilting. 

At this point, I stop and audition designs for the quilt center using plastic and a wet erase marker. (Caution: wet erase markers are NOT for use on fabric. I store them in a drawer away from all my fabric markers). Here I'm using a plain old fabric ruler because it's handy. I'm auditioning different types of feathers within the pinwheel triangles. Once I have picked one, I practice several times to get it down in the brain.
I also try out feather arrangements in the white strips of fabric in between the pinwheel blocks. These strips help 'float' the pinwheel blocks, with the exception of yellow squares within the strips. Odd pattern but...I like a challenge! After some trial and error, I figure it out and design the quilting 'pattern' with my wet-erase-on-ruler method. 

The design looks swell on fabric! Now to file my wet erase marker safely away in the drawer...


It's taken quite a few days to be able to take this photo of the last row of pinwheel blocks! It almost makes me sad, because truly, I love to quilt feathers. It's a good thing, huh?!

Once your markings are on the fabric it's best to remove them ASAP. You'll note the sun is beaming through my studio windows, and while it's great for a cheerful mood, prolonged heat will set markings, permanently (have I said that before?!). I never rinse out markings in an unfinished quilt.  So this one was trimmed, bound (by hand to the backing) and washed in the same week. 

I love every aspect of quilting! Just about every quilt receives a hanging sleeve because my quilts are vain and like to be viewed from the walls of my home from time to time. They're rotated for viewing, and when not being used, they rest for a season by being rolled and stored in the top shelf of my bedroom closets. They're never folded unless I take them to a trunk show.
This quilt had its binding machine-sewn onto the front, and hand-sewn to the backing.


I was able to take only one shot of the finished project today. It was windy - a perfect day for a pinwheel quilt - but once I got the quilt hoisted, it acted like a sail on a boat and everything was blown away, quilt hanging system and all! 

You know what I think? I think the pinwheels on this unfinished quilt had been dormant for so long, that once they got the wind in their sails, they couldn't help but take off!


I hope you get some wind in YOUR sails and finish at least one project this summer.  Call me if you need help completing it!


Wednesday, May 3, 2017

Trunk Show! Discounts!


Recently the Ladies of the Lake Quilt Guild (http://www.lolquiltguild.org
asked me to present a Trunk Show of my quilts I've quilted during the 12 years I've been in business.  

I own dozens and dozens of quilts. How do I select the ones that best represent my passion? Since I only had a little over half an hour for my presentation, time became the controller. I whittled down to a couple dozen; the genres being vintage and contemporary. I organized the quilts, folding them into stacks by number for order of presentation. Whew! I didn't go over, thanks to my helper husband who was awesome. Before and after the Show I had a table set up for additional viewing and things for sale (above). I wish you could've been there! The next best thing is taking a look at my Galley Tab on this blog site.  You'll see a few of them there.

And now to the discount section of my blog post that only my loyal blog followers get to take advantage of:

During May 2017 schedule your consult 
and receive 15% off quilting services!*

*Edge-to-edge designs only.
Quilt(s) do(does) NOT need to be finished in May to qualify, just calling to book your in-studio consult DURING May. Consults are always free of charge.