Friday, January 22, 2016

Feel the Love in my "February 14 Special"!


Feel the love by making your “February 14 Special” appointment during the month of February and receive 14% off quilting charges for one edge-to-edge project...maybe the one that is STILL hanging in your closet!!!  In addition to this discount, you can receive 10% off quilting charges on additional projects by referring friends who also become customers during this time period.

Are YOU feelin' the love yet?!


Thursday, January 7, 2016

Stretching a Quilt Block over Canvas

Think of it.  Quilting is art.  
Why can't a block be displayed on canvas, without having been painted with oils? Here I've taken a block quilted the Hawaiian way; needleturn appliqué and echoing.  I've assembled all the materials needed to stretch the block to a 12" x 12" x 1 1/2" canvas frame, found at craft or art supply stores. Also at the ready is a fully-loaded staple gun, found in most garages :).

But before we staple it permanently, let's take a peek at the stitching on the back!
The first task is to center the quilt block over the canvas.  Some of you may be really good at using the eyeball approach here.  I admit I'm compulsive at using a ruler.
Oh, a disclaimer should go here.  My husband was nice enough to take these pictures while my hands were quickly assembling this project.  If the photographs come out fuzzy, it's a bit my and his fault :). 
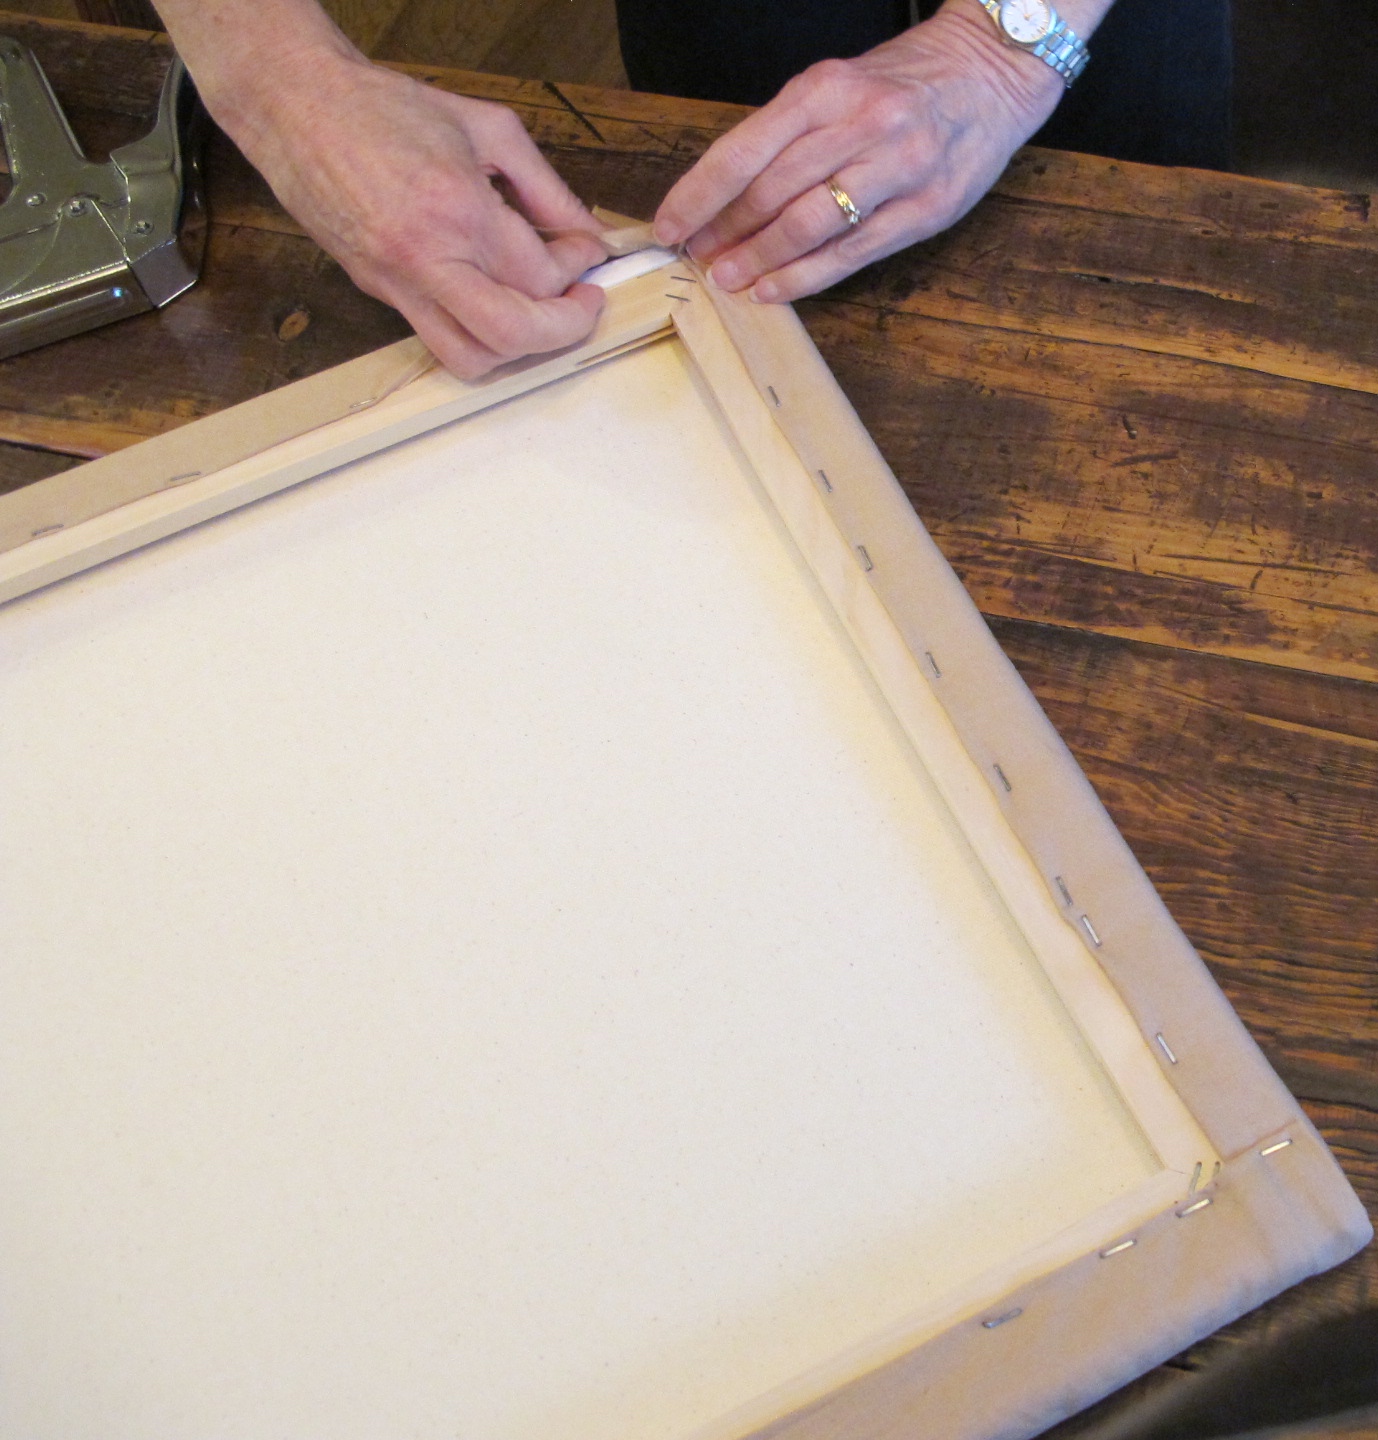
Moving on, once your block is reasonably centered, start stapling in the center of each edge working out towards the corner and alternating sides, folding the fabric over a bit as you go to prevent fraying.  Above, you can see the centers stapled on each side before working to staple a complete side.  
A good moderate, consistent tug on the fabric before stapling will suffice and assure the fabric won't be too stressed over the canvas frame.  Once the centers on all four sides have been stapled, work on stapling toward the corners, leaving them open.
Folding the fabric is kind of like wrapping a present, with three layers of 'paper'.  So, it's helpful to corral the batting by shaping it and stapling it over each corner of canvas first, before folding the fabric (below).  Doing this also ensures a soft corner, just like your edges.
After the batting is secured, the tedious part of this project begins.  Patience pays off as you keep the first fold taught to the corner while you fold the other side...


When you get the fold in the direction you want (folding two adjoining corners the same direction ensures a smoother application)...
...staple the corner first, then secure the remaining edge until it's all down.
Your goal is to have as smooth a corner as possible.  Notice the seam along the edge, shown below.  My block wasn't big enough for universal canvas sizes, so I had to sew more fabric along each edge!  I thought I was going to make another pillow out of this project, changed my mind to canvas it, and ended up having the cart before the donkey.  For YOUR canvas project, make sure your block is cut large enough to allow the extra yardage to be folded over to the back of the frame.
Staple all corners, and flip over for the reveal!  Yes, I used the screwdriver to remove staples I lodged in the wrong places!  Not through my fingers though, thank goodness...


Every quilt needs a label, and this one is no exception. Using my Pentel Gel Roller Pen for fabric, I create a quilt label. I highly recommend this gel pen. It's totally permanent, fabric-safe, and won't fade through time or washing, though this one won't ever be washed, of course.


For those of you interested in the Hawaiian needleturn-method, I highly recommend Hawaiian Appliqué, mostly for her patterns.  The basic process is shown below, left to right, from pinning, basting, needleturning and our finished project from today's post.


The Hawaiians on Maui like these stout needles for their appliqué work, and so do I.


Do you have a single block you've been wondering what to do with?  Whether it be your grandmother's single block, or an orphan of your own, think of stretching it over canvas!  
I hope I've inspired you to think of a different way to display your treasures!

Monday, November 23, 2015

Featuring: TQS 2016 Block of the Month!

Photo by Gregory Case Photography


When I was chosen as the quilter 
by TQS (The Quilt Show) for 
the historic Rajah Quilt remake 
that made its debut in their booth during the 2015 International Quilt Show in Houston this October,
I was flabbergasted.
But stoked.

It is pictured here just exactly as I remembered having quilted it a few months ago :).


Meet the designer, Lessa Siegele; teacher, judge and quilt maker.  


Lessa has been teaching quilting since the mid-'70s and has enjoyed every moment of meeting and sharing her knowledge with quilters around Australia and abroad. Her love is traditional quilts and promoting early Australian quilts. 


One of her favorites is the Rajah Quilt, in the collection of the National Gallery of Australia in Canberra. It's a huge quilt, approximately 128" inches square, shown here.


Made in 1841, it was sewn by women convicts on board the ship Rajah, which left England in April 1841 and arrived at the penal colony of Van Diemen's Land (now known as Tasmania) that July. 


From TQS: "Lessa Siegele recreated it in quarter scale with fabrics from her stash – thinking that's what might have happened when the original quilt was being made - loosely following the colors of the original quilt, and tea-dying fabrics that didn't look old enough.” 

You can make this Rajah Quilt BOM (66” x 66”), made with Cotton + Steel fabrics, starting January 1, 2016.   Again, from TQS:  “In the meantime, to help you get ready, you can download the Introduction Packet, which includes everything you will need to begin working on the "Rajah Quilt Revisited" BOM quilt.  From fabric requirements and color selections to appliqué and embroidery tutorials, we have thought of everything to make this an enjoyable and rewarding journey for you to cherish."  Check out thequiltshow.com for the packet.

The quilting process?  Never thought you'd ask!  It began late this summer after receiving it from the piecer/appliquér...
 Before loading custom quilts, design choices dance in my head for a few days.  I decided this quilt needed freestyle quilting, and I came up with all the designs.  I guess you could say it's one-of-a-kind.
A feather design spoke to me, and I listened. The crosses were all immpecably stitched in reverse appliqué.  What a pleasure to stitch around.

 All other motifs, such as flowers, birds and leaves, were regular appliqué.


What an opportunity to do my third quilt for TQS!  After I completed the quilting, it was sent off for binding.  I was invited by the Editor-in-Chief, Lilo Bowman, to the taping of the finished quilt in their Denver, Colorado studio in September, as well as to Houston Market for a "Meet the Quilter" (that's me!) business card signing.  Unfortunately, the only thing I could afford were the business cards, which were handed out at the booth, shown here! A friend coincidentally made it to the taping in Denver, and emailed me with the news she had seen the quilt.  Ah, well.  The joy was in the quilting, after all, not the 'fame'.  And so it should be.


Here's hoping you have a blessed Thanksgiving holiday that finds you with an overflowing fabric stash waiting for you to create something that's...one-of-a-kind.


Monday, November 2, 2015

Just in Time for Thanksgiving


We quilters love color.
Who can resist fall hues all around us in oranges, rusts, yellows and reds? I have two patterns for you on the web, one free and one at a small cost - both bursting with color you provide from your stash.  
One is a 12" x 12" mini-quilt and the other is a pumpkin made from scrap flannels or homespuns.


The pattern for this pumpkin-laden fellow is on thewoodenbear.com.  Type in the search engine "November Turkey" and they'll send you a paper pattern via USPS at a small cost.  Don't worry -  we have a few days before Thanksgiving - and these whip up super quick. While on this site, take a look at their other patterns.  You can make a mini-quilt for every month of the year, towels for the kitchen and gifts, etc.  

Which leaves the site for the pumpkins.  I stitched these up in half a day with leftover flannels - no cost for materials AND no cost for the pattern.  Check it out at allpeoplequilt.com; then enter "Scrap Lab Table Runner and Pumpkins" in the search engine, then click on the pattern. You can download with just another click, then print.
I hope you enjoy these quick, adorable projects.
But get to sewing before there's frost on your pumpkins!


Wednesday, October 7, 2015

Northwest Quilting Expo 2015

My first visit to the NW Quilting Expo was experienced as a vendor.  What a great venue!  I spent three solid days meeting so many quilters. 'Kindred spirits', I call them; sisters in quilting who don't start yawning when you're still talking quilt jargon after 10 minutes. One such quilter came to my booth with a photo journal of her quilts that included a picture of fortunate recipients with each quilt, even quilt tops with the intention of going to someone when the project was lovingly completed. 
Getting to know people and why they do the things they do is the part of my quilting business I love most.  
I was so busy at my booth I only had 45 minutes to visit the actual show!  My booth neighbor from Patchwork Acres kindly watched my things so I could browse through some 600 quilts that competed for ribbons, including two of mine (pictured later in this post).  More about Patchwork Acres: if you want to come near the Oregon coast for a quilting/fiber art retreat look no further! Check it out at patchworkacres.com.  
 
My last post went into great detail on how I quilted my raffle quilt, a vintage '30s tea cloth. It received so much attention, and many tickets were sold!  

As promised, I've included a photo shoot of the completed quilt...


Out in the sun at home.
The center medallion.
A shot of freehand feathers in a corner.
The medallion, zoomed in.
Blowing gently in the fall breeze.
The hanging sleeve, before I sewed it down!  (It's sewn on now :).  As I had mentioned in my last post, a damaged vintage summer coverlet was repurposed just for this quilt.  It provided a showy sleeve and 2 1/2" wide strips for binding.
I just love the embroidery on this piece.  Classic '30s.  It received the attention it deserved: a freehand appliqué quilting technique to include micro-stippling for dramatic contrast.

And my two entries?  If you've been to this show in the past, you know the entries are masterpieces.  Mine are not. Please keep that in mind as I show you mine!

The first is "Hibiscus on the Lanai".  Do you recognize it from earlier posts?!?!
The second is "Autumn Splendor".  Of course, this one is currently hanging in my home because it's, well, autumn.

For those of you who signed up at the show to receive these posts via your email, welcome!  If you are also a raffle ticket purchaser, thank you!  Hopefully you will be the recipient of this 0ne-of-a-kind quilt. 

Until then, I hope to talk to you later!